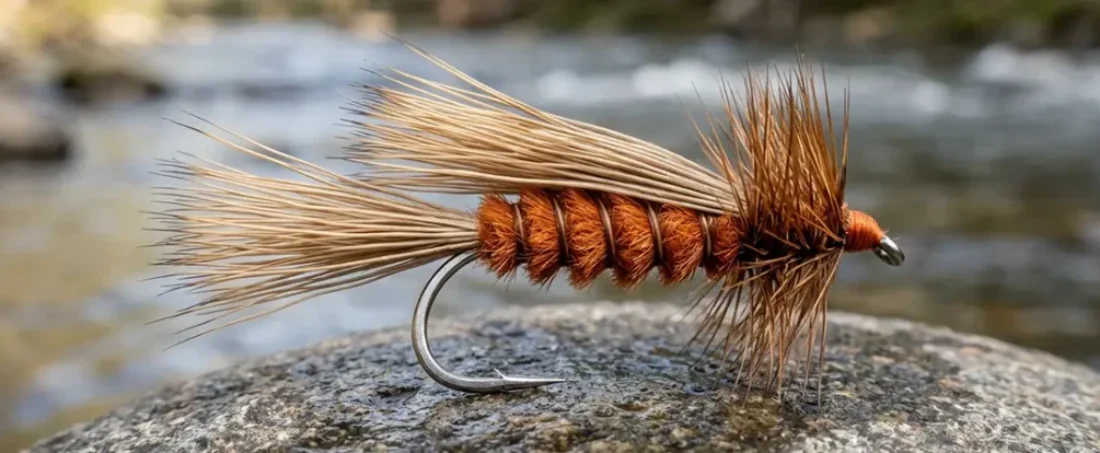
Montana’s Classic Stonefly Bench: The Improved Sofa Pillow and Bird’s Stonefly
Series: Montana’s Classic Stonefly Bench — Article 1
There are flies on your bench right now that exist because someone smarter than you sat down with a hook, a spool of thread, and a genuine problem to solve. Not an aesthetic problem. Not a marketing problem. A fish problem.
Pat Barnes had a fish problem.
It was the salmonfly hatch on the Madison, and the flies available to match Pteronarcys californica — the largest stonefly in North America, a bug the size of a man’s thumb — were inadequate. Too small. Too fragile. Too pretty. The fish didn’t care about pretty. They cared about whether the thing floating over them looked like the orange disasters that were falling out of the streamside willows in such numbers that you could hear them hitting the water.
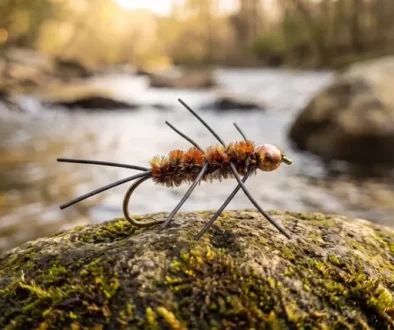
Pat tied something that looked like the real thing, landed like the real thing, and rode fast water like it belonged there. He called it the Sofa Pillow. He sold it out of his fly shop in West Yellowstone, tied it for clients he guided on the Gallatin and the Madison, and started a tradition that every serious Montana tier eventually comes to terms with.
I came to terms with it on Pat’s bench.
I was young enough to still think that complicated was better, and Pat was patient enough not to say what he was probably thinking. He showed me the Sofa Pillow, walked me through the elk hair, explained why the wing had to lie flat and why the hackle had to be full and why none of it worked if you got stingy with materials. Then I rowed him down the Missouri, fished Barnes Hole with him, stood in Buffalo Ford on the Yellowstone and watched him work a Goofus Bug — another pattern that came off his bench — through the cutthroat lies with the kind of casual precision that takes a lifetime to develop. The man didn’t make unnecessary casts and he didn’t tie unnecessary materials into a fly. Every pattern he built had a reason for existing and the Goofus Bug and the Sofa Pillow both prove it. The two things were never separate for him — what he tied and how he fished were the same conversation.
This is the first article in what will be a running series — Montana’s Classic Stonefly Bench — working through the foundational patterns that shaped western dry fly fishing one generation at a time. We’re starting at the beginning, with the two patterns that defined the salmonfly hatch before anyone had a formula for it.
The Improved Sofa Pillow. The Bird’s Stonefly. Learn both. Tie both. Fish both. One of them will save your season.
Table of Contents
What You’re Actually Matching
Before you touch a hook, understand the bug. Pteronarcys californica is a size 2 to size 6 problem depending on where you are in the hatch cycle. The adults are burnt orange to rust-orange on the abdomen, dark brown to black on the thorax and wing case, with mottled brown wings that fold flat over the body like a tent. They are clumsy, heavy fliers that prefer streamside vegetation and end up on the water by accident — blown off willows, knocked off rocks, dropped from overhanging brush. When they land, they don’t float delicately. They sprawl. They struggle. They make a mess and the trout know exactly what that mess looks like.
Your dry fly needs to communicate three things from below the surface: size, color, and movement. The Sofa Pillow and the Bird’s Stone accomplish this differently but arrive at the same result. Know why each fly works and you’ll know when to reach for which one.
Peak hatch timing on Montana’s primary salmonfly rivers runs roughly as follows — water temperature and elevation dictate everything, so treat these as starting points, not guarantees:
- Bitterroot: Late May through mid-June
- Clark Fork: Late May through June
- Gallatin: Late May through mid-June
- Madison: Late May through early July
- Missouri: Mid-June through early July (upper canyon section)
- Rock Creek: Late May through mid-June
- Yellowstone River: Late May through Fall I through these patterns, trout will take as a hopper. The Yellowstone, Spring Creeks and the area’s small streams have become my home waters as of late.
The hatch moves upstream as the season progresses. If you miss it on one stretch of river, follow the bug upstream rather than waiting for it to come to you. This is not complicated advice. Most people ignore it anyway.
How to Tie the Improved Sofa Pillow — Pat Barnes
Reason This Fly Exists
The original Sofa Pillow solved Pat’s immediate problem — a salmonfly imitation that could survive a full day on fast water and actually looked like the natural from below. The Improved version fixed what the original created: better float, cleaner wing, a hackle presentation that holds up when a size 4 dry is grinding through a seam all afternoon. This is not a subtle pattern. It is an orange elk hair brick and it is supposed to be. On the Madison, the Gallatin, the upper Clark Fork, and anywhere else that Pteronarcys shows up in numbers, it gets eaten.
Hook & Materials
| Component | Material |
|---|---|
| Hook | Partridge K15DE, 2X long dry fly size 2-8 or a Partirdge D4AF 4X Streamer Hook, size 2–8 (long hook for bigger flies) |
| Thread | Semperfli Classic 6/0, burnt orange |
| Tail | Natural elk hair, stacked, medium to coarse fiber |
| Abdomen | Orange elk hair tied in segments, or burnt orange angora/Monster Bush Fur dubbing |
| Rib | Ewing Brown Dry Fly Cape or Saddle Hackle, palmered through abdomen |
| Wing | Natural elk hair, medium grade, stacked and tied flat |
| Front Hackle | Brown rooster, 2 full saddle or cape hackles |
| Head | Semperfli Class 6/0 Burnt orange thread, whip finished and lacquered |
Hook note: The Partridge K15DE gives you the hook gap you need to stick fish on a big, wide dry fly. Don’t downsize the hook trying to lighten the fly. Salmonfly fish hit hard and they hit surface flies in fast water. You need the gap.
Tying Instructions
Step 1 — Mount the Hook and Start Thread
Mount a size 4 or 6 Partridge hook in the vise. Start your burnt orange thread at the eye and wrap a smooth, even thread base back to a point directly above the barb. Keep thread wraps tight and touching — no gaps in the underbody.
Step 2 — Tail
Cut and stack a moderate clump of natural elk hair — roughly the diameter of a wooden matchstick. Align the tips in a hair stacker until they’re dead even. Measure the tail against the hook shank: length equal to roughly half the shank. Tie in with three loose, controlled wraps, then tighten progressively. The tail should point straight back, not flare upward. Trim the butts at a 45-degree angle and cover with thread.
Step 3 — Hackle Rib
Select a Ewing brown saddle or dry fly hackle with fibers appropriate for hook size — roughly 1.5 times the hook gap. Strip the base, tie in by the tip at the tail tie-in point. Let it hang for now.
Step 4 — Abdomen
Elk hair method: Cut a clump of dyed orange elk hair, remove underfur, stack lightly. Tie in at the tail with tips pointing rearward. Pull forward and bind in two or three segments at the midpoint and front of the abdomen. This creates a segmented, bulky body with natural taper.
Dubbing method: Spin burnt orange angora or Rusty Crawfish Monster Bush Fur on the thread and wrap forward in touching turns to the two-thirds point. Cleaner on a first tie and fishes identically.
Step 5 — Palmer the Hackle
Wind the Ewing brown saddle or cape hackle forward through the abdomen in four to five evenly spaced turns. Tie off at the front of the abdomen, trim the tip cleanly. The palmered hackle adds leg suggestion and props the fly slightly off the surface — both reduce water absorption and improve visibility on fast water.
Step 6 — Wing
Cut and stack a substantial clump of natural elk hair — larger than the tail, approximately one and a half times the volume. Tips must be perfectly even. Measure length: wing should reach the tip of the tail. Tie in directly in front of the abdomen with progressive-tension pinch wraps. The wing must lie flat over the back of the fly. Flare is the enemy. Trim butts at an angle and cover with thread.
Step 7 — Front Hackle
Select two matched brown saddle or cape hackles. Tie in both together at the base of the wing. Wind forward in touching turns — three to four wraps minimum — tie off behind the eye, trim excess. Sweep fibers rearward and hold them while you whip finish. The front hackle keeps this fly riding high on fast water. Don’t shortchange it.
Step 8 — Head and Finish
Build a smooth thread head, whip finish twice, apply a drop of hard head cement. Let it cure before you fish the fly.
Tying Notes
This fly lives or dies on the wing and the hackle. Stingy elk hair on the wing produces a fly that rolls over in fast current and becomes invisible to the angler before the fish ever see it. Oversized hackle produces a fly that sits too low to trigger takes from selective fish. Carry this pattern in sizes 4, 6, and 8. Match hook size to the naturals on the water, not to some general concept of salmonfly size. Late-season fish on pressured water key on the smaller adults. Opening day of a fresh hatch on the upper Gallatin? Size 4.
How to Tie the Bird’s Stonefly — Cal Bird
Reason This Fly Exists
Cal Bird developed the Bird’s Stonefly in the 1960s to solve essentially the same problem Pat Barnes was working on from a different direction. Most salmonfly imitations of the era were too complicated to tie in volume, too fragile for fast water, and too finished-looking to match an insect that is, honestly, not graceful. A salmonfly rides the water like something that regrets its life choices. The Bird’s Stone captures that profile — bulky, high-riding, and simple — without a single unnecessary material.
It has been in continuous use by Montana guides for six decades. That is not a coincidence.
Hook & Materials
| Component | Material |
|---|---|
| Hook | Partridge K15DE, 2X long dry fly size 2-8 or a Partirdge D4AF 4X Streamer Hook, size 2–8 (long hook for bigger flies) |
| Thread | Semperfli Classic Waxed 6/0 |
| Tail | Elk hair, dyed orange, stacked |
| Abdomen | Orange elk hair, divided into three bound segments |
| Hackle | Ewing Brown dry fly hackle, palmered through abdomen |
| Wing | Natural elk hair, medium grade, tied flat and low |
| Thorax | Orange elk hair or orange dubbing |
| Head Hackle | Ewing Brown dry fly hackle, 2–3 turns |
| Head | Orange thread |
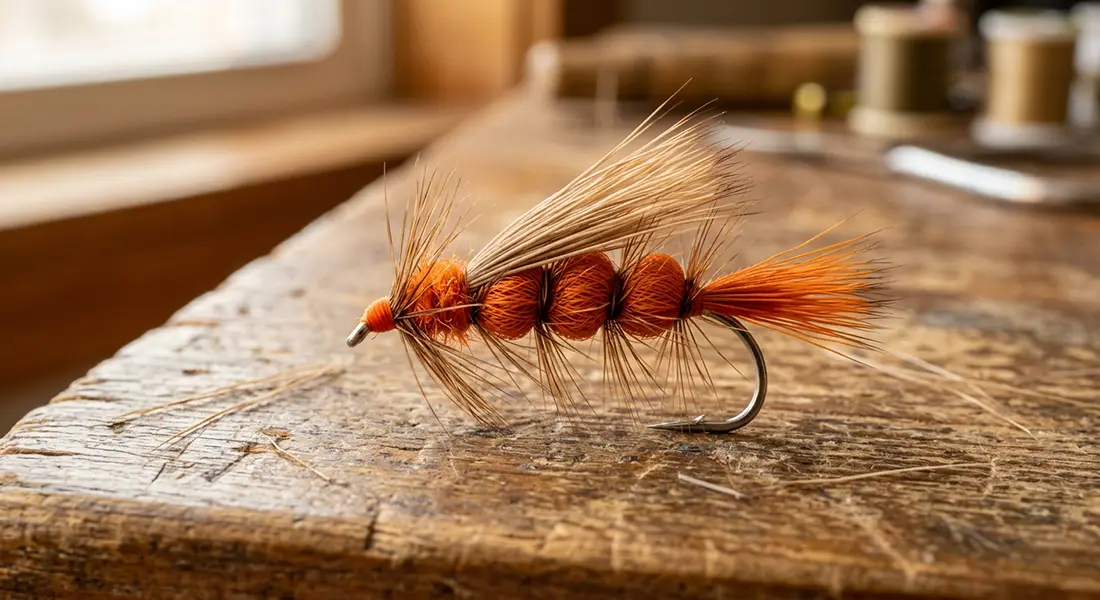
Bird's Stonefly
Material note: The Bird’s Stonefly is an elk hair pattern start to finish. This is not an accident. Elk hair is hollow, stiff enough to support the fly on fast water, and takes dye consistently. Do not substitute deer hair on the body — the fiber is too fine and the fly mats down in moving water faster than you want.
Tying Instructions
Step 1 — Mount Hook and Thread Base
Clamp a size 4 or 6 Partridge K15DE in the vise. Wrap orange thread from the eye to a point above the barb, building a smooth, even underbody. The thread base matters on this fly — the elk hair segments are bound against it and they’ll slide without a solid foundation.
Step 2 — Tail
Stack a moderate clump of dyed orange elk hair until tips are perfectly aligned. Length equal to the hook shank or slightly shorter. Tie in with three soft wraps, then tighten. The natural slight splay of stacked elk hair is correct here — don’t fight it.
Step 3 — Hackle
Tie in a brown dry fly hackle by the tip at the tail tie-in point. Strip the base fibers and bind flat against the hook shank, tip pointing rearward. This will be palmered forward over the abdomen segments.
Step 4 — Abdomen Segments
This is the defining step of the Bird’s Stonefly and the one that takes practice to make look right. Cut three small, equal clumps of dyed orange elk hair, underfur removed.
First segment: Tie in at the base of the tail, tips pointing rearward. Pull forward slightly and bind down firmly one-third of the way up the shank. The segment should sit slightly convex — rounded on top.
Second segment: Tie in directly in front of the first. Bind at the two-thirds point.
Third segment: Tie in front of the second, bind just behind the midpoint of the hook shank. The abdomen should read as a series of rounded, connected lobes — orange and substantial. Keep thread wraps tight and clean at each binding point.
Step 5 — Palmer the Hackle
Wind the brown hackle forward through the three abdomen segments in four to five evenly spaced turns. Tie off at the front of the abdomen, trim the tip. Trim hackle fibers below the hook shank that would sit between the fly and the water surface — a flat bottom improves surface contact and the fly sits more naturally in the film.
Step 6 — Wing
Cut and stack a substantial clump of natural elk hair. This is a large fly and the wing needs to be proportional — use more hair than feels right. Measure: wing extends to the tip of the tail. Tie in directly in front of the abdomen with firm, controlled wraps. The wing must lie flat and low over the body. This is a downwing silhouette and it needs to look that way from below the surface.
Step 7 — Thorax
Build a modest thorax with orange dubbing or a small clump of orange elk hair in front of the wing tie-in. Two to three thread turns. The thorax is not large — it provides a clean transition between the wing and the front hackle.
Step 8 — Front Hackle
Tie in one or two brown dry fly hackles in front of the thorax. Two to three turns forward, tie off, trim. Sweep hackle fibers rearward while applying thread pressure to hold them back.
Step 9 — Head and Finish
Build a small, clean orange thread head. Whip finish twice, trim, apply a drop of hard head cement to the thread wraps.
Tying Notes
The Bird’s Stonefly is faster to tie than it reads. Once the segmenting technique becomes natural — and it takes about a dozen flies — you can produce this pattern in under ten minutes. At four fish per fly on a good hatch day, ten minutes is a reasonable investment.
Tie in sizes 4 and 6 for salmonfly hatches on the Madison, Gallatin, Rock Creek, and Blackfoot. Drop to size 8 and swap to yellow or golden elk hair for golden stonefly imitations on smaller streams. The tying method is identical — only hook size and body color change.
Sofa Pillow vs. Bird’s Stone: When to Reach for Which
They’re both elk hair stonefly dries. They both work. Here’s the practical difference:
The Improved Sofa Pillow floats higher, casts a bigger profile, and is more visible to the angler in broken water. It’s your lead fly on the first pass through any run during an active hatch. Put it in the seam and let it work.
The Bird’s Stonefly sits lower, presents a more compressed silhouette, and tends to perform better on selective fish — particularly on water that’s been fished hard or later in the hatch when the adults have been on the water long enough that the trout have developed opinions. When fish are refusing the Sofa Pillow, reach for the Bird’s Stone before you reach for something smaller.
Fish both on a short, stout leader — 7.5 feet maximum, 2X or 3X tippet. These are big attractor dries on fast water. Delicate presentations are wasted effort and a 4X tippet will spend more time twisted around itself than delivering flies to fish.
What’s Next in the Series
Montana’s Classic Stonefly Bench continues in Article 2 with the Improved Bird’s Stone and the Kaufmann Stimulator — the patterns that bridged the Barnes and Bird generation to the tiers who came after. Mike Lawson refined the Bird’s Stone on the Henry’s Fork. Randall Kaufmann took the elk hair concept and built something that works from the salmonfly hatch straight through the golden stones and into late summer. Both belong on your bench before mid-May.
Article 3 moves into the golden stonefly world and the early-season Skwala hatch — the stonefly fishing that serious Montana anglers are already doing in March while everyone else is still arguing about what to tie.
The bench doesn’t wait for warm weather. Neither should you.
Montana’s Classic Stonefly Bench is an ongoing series covering the foundational western dry fly patterns from the tiers who built them.